A Thermal Education: AN/PAS-13, NET and Do-It-Yourself Thermal Targets
by PEO Soldier/PM Soldier Sensors and Lasers
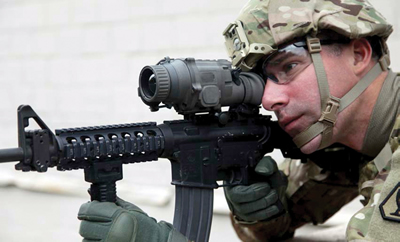
A Ranger student rappels from an overhang on Yonah Mountain on 3 June 2014. (Photo courtesy of 982nd Combat Camera Company)
The Army’s lightweight AN/PAS-13 Thermal Weapon Sight (TWS) gives Soldiers the ability to spot and engage even a well-camouflaged enemy night or day through dust, smoke, or fog, but attaining proficiency requires training and practice. To ensure Soldiers get the training and practice they need with thermal sensors, Project Manager Soldier Sensors and Lasers (PM SSL) has developed not only an innovative training program, but do-it-yourself (DIY) thermal targets that keep the cost of training with thermal sensors affordable for any unit. This is critically important as we face diminishing budgets and continue to seek efficiencies. Keep in mind that even the Army’s most advanced, game-changing sights won’t provide Soldiers an advantage if they’re left in the arms room, so the first step is to ensure you have the proper kit on hand.
The Sensor
Today’s TWS are lightweight systems, which can mount on a weapon rail and operate beyond the maximum effective range of the weapon. New 17-micron technology makes it possible to produce a clip-on TWS for your weapon. Soldiers can use the TWS in the clip-on mode (mounted to a weapon, in-line with a day optic) or in stand-alone mode (mounted to a weapon without a day optic).
An example of the AN/PAS-13’s detection capabilities and life-saving effects in theater comes from SGT Joshua Cowan of the 3rd U.S. Infantry Regiment (The Old Guard). “We were coming back one time from a counter-IED (improvised explosive device) mission. My gunner called up and said, ‘Sergeant, I think I see something.’ We pulled over and stopped. We went up for a look. And from a good 600 meters out, we could see very clearly two individuals digging a hole for an IED while two more armed men pulled security for the diggers. I don’t think we would have seen those people — at that distance — with just the night vision goggles.”
Shaking Up NET (New Equipment Training)
The TWS is a key enabler to ensure Soldiers acquire, engage, and destroy targets well before the enemy detects them on the battlefield. However, proper training is essential in order to achieve a high level of proficiency employing thermal sensors. PM SSL’s NET training includes the highest caliber of instructors, coupled with an emphasis on hands-on range training.
One staff sergeant participating in NET commented in an after action review, “I never operated a PAS-13. So to take a block of instruction, zero, and acquire targets at 800 meters is unreal… This was the best week-long shooting school I have went to (Army or law enforcement).” A sergeant major professed, “The knowledge and experience of the instructors is so vast that they were truly impressive… This scope (TWS) is unbelievable. I was constantly hitting targets at 800 meters in the dark.”
With Thermal Weapons Sights on hand and training complete, the remaining roadblock to maintaining proficiency for many units and Soldiers can be the expense of thermal targets. Store-bought thermal target costs add up quickly after a few days at the range. In order to enable Soldiers to train to standard without exceeding the training budget, the NET team developed their own thermal targets. Because even the best marksmen need refresher training, PM SSL is sharing the low-cost thermal target design with the greater Army community.
Making your DIY Thermal Targets
While a standard thermal target costs approximately $60, a DIY version in raw material — excluding the labor hours set aside to purchase and assemble them — amounts to approximately 24 cents apiece and makes the DIY approach an easy decision. In addition, the DIY thermal targets require no additional power source, giving you flexibility where you use them. This cost-effective training aid can be used both at live ranges as well as an inert training environment designed to sharpen target detection skills. Thermal paper (or tape) has a natural reflective property that makes practice targets visible using a TWS even in near-zero illumination. The idea is to create a simulated weapon-shaped thermal signature across the torso of an E-type silhouette.
Here’s what you’ll need (Figure 1):
- E-type Silhouette Target (NSN: 6920-00-795-1806 or NSN: 6920-00-600-6874)
- Can of adhesive spray glue (NSN: 8040-00-782-0433)
- Thermal Paper (NSN: 7530-00-523-9981)*
- Knife or scissors to cut the thermal paper
Note: Cut strips into the following sizes:
- One 2 inches wide x 18 inches long
- One 2 inches wide x 4 inches long
- One 2 inches wide x 2 inches long
*You can also substitute aluminum tape (NSN: 7510-00-684-8803) for the thermal paper, eliminating the need for glue and cutting.
Step 1: E-type Silhouette Target
Place your E-type target on a flat surface with the green side up. Approximately 4 inches down on the left side (just below the shoulder area), spray the glue from left to right slightly angled upwards, until you reach the right shoulder. This will eventually be the upper receiver. Your glue pattern should be several inches wide.
About 3 inches in from the left side, spray a 4 inch swath downward so that you can place the 2” x 4” strip on it, which will form the pistol grip.
In the center of the head, spray (either nose or eyebrow level) a 2” to 3” spot for your 2” x 2” piece of thermal tape. Allow to dry to a point that it is still tacky.
Step 2: Thermal Strips
Holding the spray glue about 6 to 8 inches away from the thermal strip, spray the backside. This is the side that has no color.
Step 3: Making the Target
While still tacky, take your 2” x 18” thermal strip (upper receiver) and place it on the target, ensuring that you angle it up to the right shoulder.
Then place the 2” x 4” strip for the pistol grip.
With the remaining 2” x 2” strip, place it in the center of the head to give the shooter a point of reference while making head shot.
If you have done this correctly, your target should look like a man holding a weapon at “Port Arms.”
Here are some additional tips for your DIY thermal targets:
- In foul weather, place a clear plastic bag over the top of the target but make sure to open the plastic bag. This will keep the integrity of the glue a lot longer. Note: If you are zeroing the AN/PAS-13, the spotter will still see the impacts of the round through the plastic bag.
- Remember that the target needs to be leaned/tilted back at a 10–12 degree angle in order to see the reflection through the thermal weapon sight, AN/PAS-13. Now you are ready to train to proficiency in all operational environments. Hooah!
 Share on Facebook
 email
email print
print
Figure 1 — Bradley ECP 1 & 2 Technologies